Archive | Tulips

‘All of the Garden’ Bouquet

Clare West (photographer and lover of flowers – great combo) was with us again last month, you can see her blog post about what we are up to in the garden here.

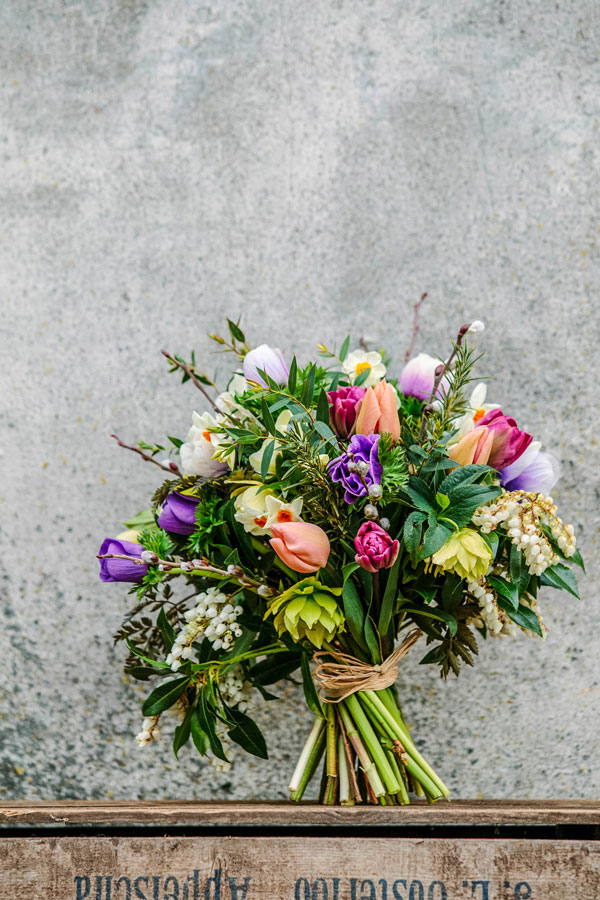
I thought it would be an ideal opportunity to record the picking and making of our new All of the Gardenbouquets. They are exactly what they describe – everything that is in flower that week gathered into a gorgeous garden bouquet.

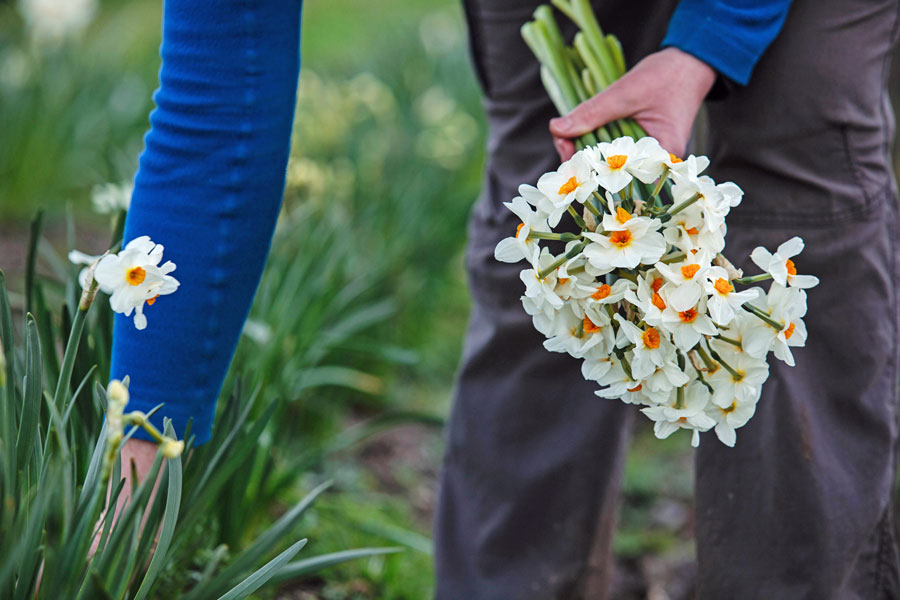
We started in the field by picking my favourite Narcissi variety ‘Geranium’ – wonderful scent and a good stem length for hand tied bouquets.

Picking-narcissi

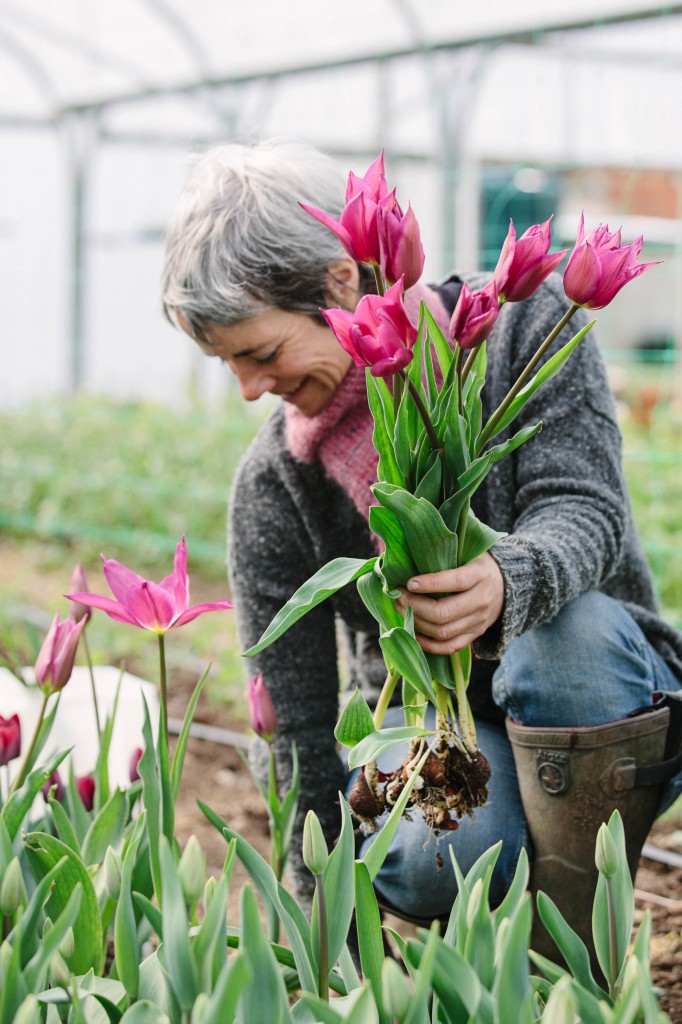
 Next it was in to the polytunnel to pull a few tulips, this one is a lily-flowered variety called ‘Purple Dream’. People are always alarmed to see me pulling the whole tulip out of the ground and snipping off the bulb. We treat them as annuals so that harvesting and clearing the ground for the next crop is done in one go. The bulbs are composted and I get to choose new varieties for the following year.


Green & Gorgeous - March - 056


Once everything is picked, it is off to the flower studio to assemble my bounty.


rae-in-flower-studio


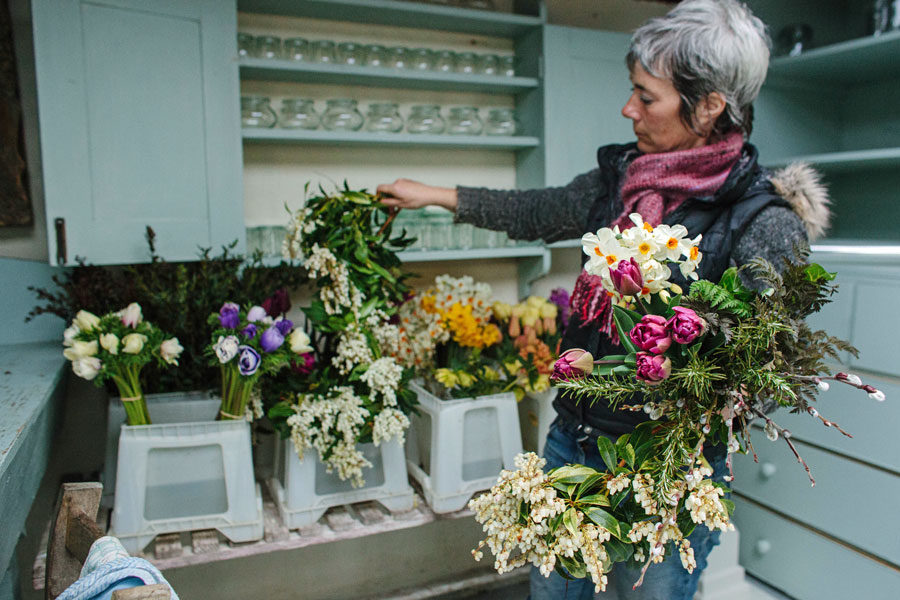
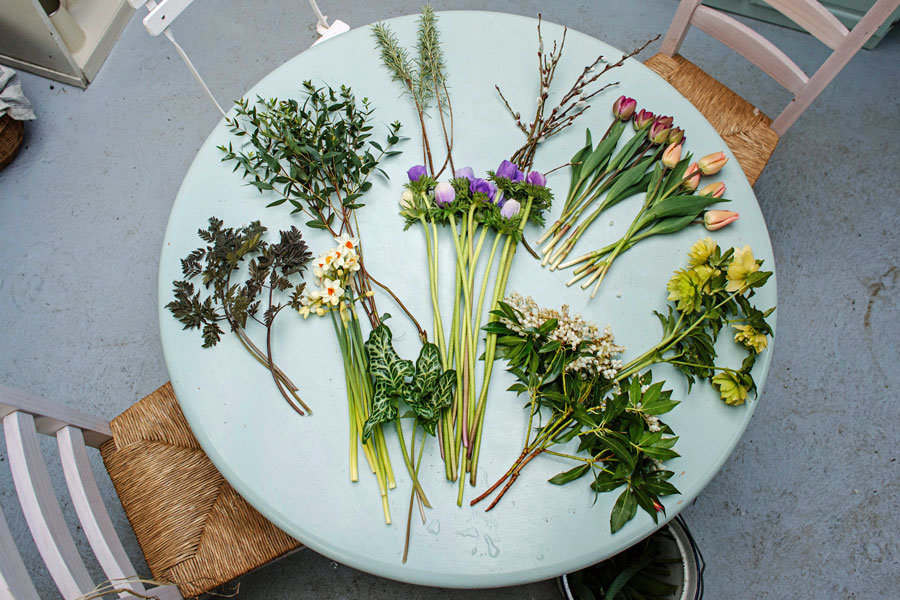
All the flowers and foliage are stripped of lower leaves and laid out in piles on the table. The more variety of materials the more textured and natural it will look, ideally I like to use about twelve. Here I am using (from left clockwise) Anthriscus ‘Ravenswing’, Eucalyptus parvifolia, Rosemary, Pussy Willow, Tulips ‘Blue Diamond’ and ‘Apricot Beauty’, Hellebore ‘Harvington Double Yellow’, Pieris, Anemones ‘Galilee Pastel Mix’, Arum italicum and Narcissi ‘Geranium’.


Green-&-Gorgeous---March---


Now I flex my hand muscles and get to work, I will keep going until everything on the table is used.


Green-&-Gorgeous---March---

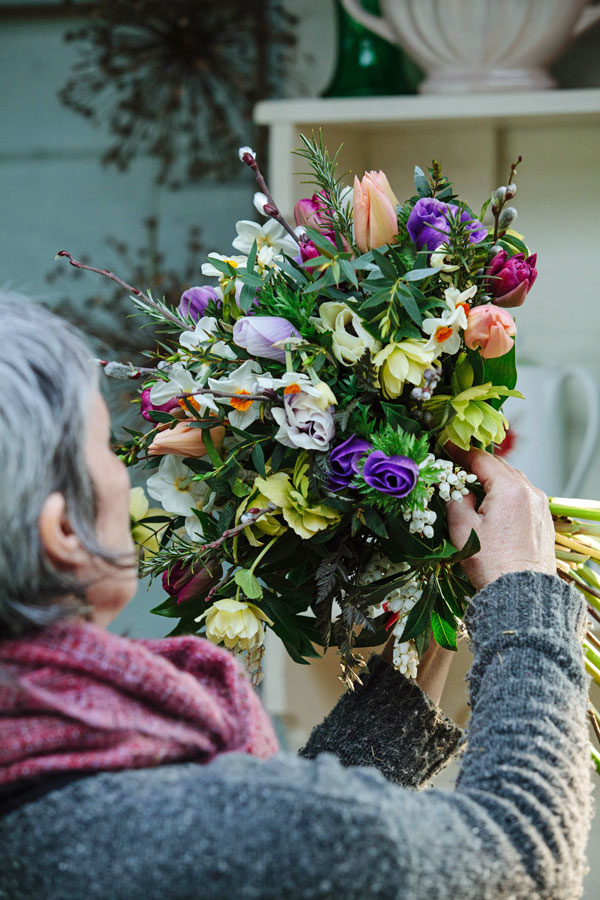
The bouquet is tied off with raffia and will be aquapacked and placed into one of our specially designed transit boxes. Off for next day delivery to one lucky recipient! You can order one of our mail order bouquets here.


lr5-173

Caterpillar Capers

When
I was growing vegetables full time, I looked down on cloches. Too far
down, too much bending down and far too much pegging down. All that
ground level shenanigans, just way too undignified in order to gain a
very small ribbon of protection. And then you can't see whatever bad
omens may be hidden beneath the plastic, either weeds, pest or diseases, and a
false sense of security was guaranteed.


IMG_20121007_161328

 So
I now find that I have spent the autumn and winter thus far wrestling
with a caterpillar tunnel, which I now realize is just a really
expensive and humongous
cloche. I
can't even stand up in it, which is the first major design fault you
might observe. However, I am limited by the 6m standard sizing of the
PVC pipe hoops, resulting in a mildly stooping scenario.


IMG_20121105_091814  
IMG_6051

The
idea comes from the USA and has been covered well by the Growing For
Market
community (NB. They call polytunnels 'hoophouses' over there).
There is an introduction to the concept here by
Lynn Byczynski.

The main features are portability, no footings, hoops that fit over
steel rebar 'pegs', and rope lashings (lots and lots!) that produce a
segmented appearance and the caterpillar profile. After spending a
small fortune reskinning a twin-span polytunnel this year, we thought
we'd give it a go, especially since you can move them to fresh ground
so easily.


We
played it safe however and have only put tulips in it this autumn,
just in case. There have been a few hiccups and several improvements
along the way, notably bigger and bigger hoops, after the Mark One, pictured below.


IMG_20121017_121625

It has been keeping
me slightly fretful on stormy nights but we'll keep you posted about
the spring blooms and whether we can get enough air flow through it.
It has seemed to cope with the winter snow so far though, and near
flooding, although it may just yet prove to be the ultimate vole
hotel….


IMG_20121127_144511

The River Thames coming up to say 'hello' last year.


Ashley
Pearson

2

Must have Muscari

It has been lovely to be back in my studio arranging flowers. I have spent a lot of time over the winter months at my laptop designing weddings and preparing quotes. I have been talking about flowers for months and finally I’ve been let loose.

The last two weddings have been a mixture of pinks and blues. I have mainly been working with anemones, ranunculus, narcissi, tulips and muscari.

The spring flowers are quite challenging to arrange due to their fleshy stems. They are often heavy headed and don’t like being in oasis. I think tulips have the most diva-like tendencies. They take a lot of careful handling and then once I’ve finished arranging after a few hours they’ve moved and pleased themselves anyway. Like true divas though, they know they are worth all the fuss! 

I’ve really enjoyed working with the muscari this year. The stems have been long and the graded blue heads have offered a delicacy to the palette. They are a fabulous bridal flower to use as they last well out of water, making them great for hair flowers and button holes. Here is a flower crown created with muscari and lily of the valley.

  IMG_4874[2]  

Here it is again mixed with narcissi and viburnum for a corsage and used with lily of the valley to create a hair clip:

IMG_4839[2]    IMG_4867[2]

The anemones have been amazing this year. The fully open heads have been so huge a couple of people have mistaken them for oriental poppies! The stems have been straight and long, perfect for constructing a hand tie bouquet.


   IMG_4820[2]

It’s always fun to do something big and bold. For last weeks wedding we created three flower balls. I used a base of choisia and viburnum then added ranunculus, anemones, solomons seal and scilla. We also used some magnolia from the family’s garden. They certainly made an impact!


  IMG_4901[2]   IMG_4913[2]


At the other end of the floristry scale, just a few stems in a bud vase can be heavenly too. Simple, natural and beautiful.

  IMG_4851

Jo Wise


0