Tag Archives | British flowers

Tablecloth Bride – seasonal snapshots from summer weddings

I have done some requests for wedding photos from some of our brides this year as we often don’t get to see full story of their day amid all the bridal hustle and bustle of the summer season. Afterwards, it’s great to observe how many plans were fulfilled and dreams achieved, especially as many of our brides do some arranging themselves. So, I just thought it would be fun to see some of the real brides with their bouquets from this year.

Photo by Craig and Kate
PHOTO BY CRAIG AND KATE

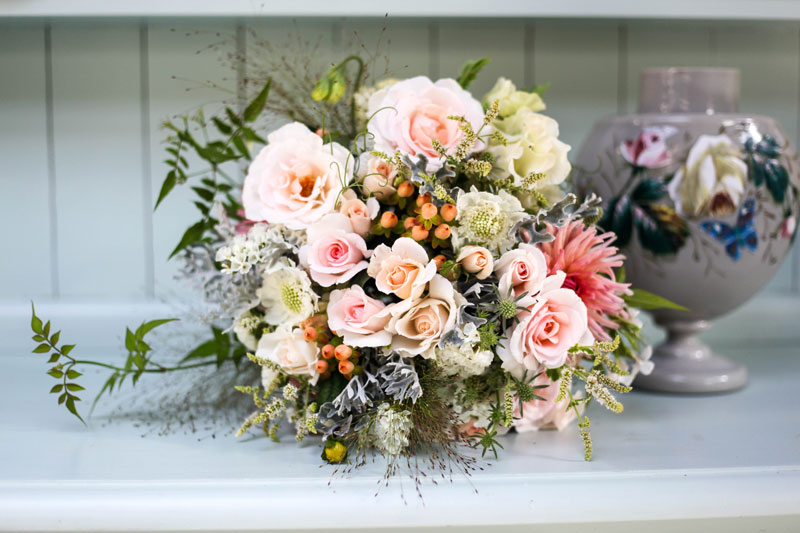
I did become rather attached to hurriedly pinning on a linen tablecloth from Habitat to photograph my bouquets before they rushed off to a busy dressing room. The bouquet looks better when held, retaining its shape and the oatmeal tablecloth set off the flower colours very well. The resulting silhouette is not terribly flattering though, maybe it is about time I bought a real dress or perhaps it’s high time I made one.

IMG_0429

IMG_0623

IMG_0709

Anyway, back in the real world, here are a few of the brides from this year with their bouquets.

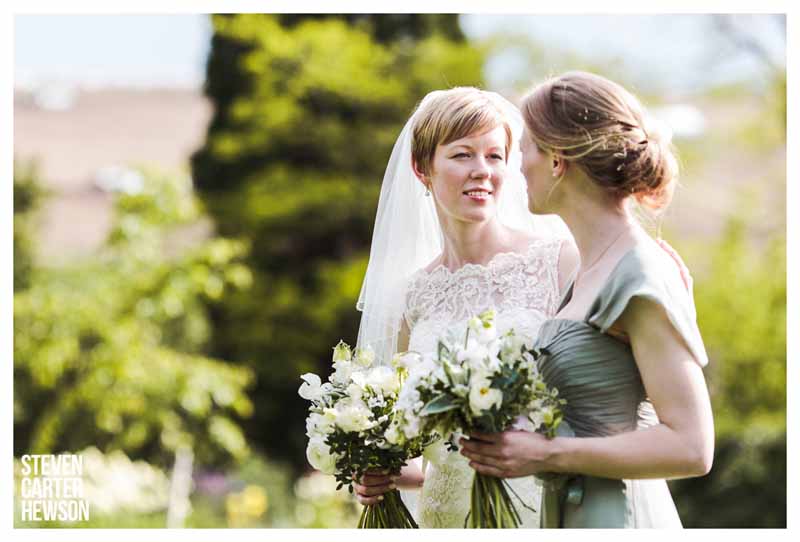
Kate decided upon whites and greens for her wedding in May, her bouquet included my favourite ivory Peony ‘Duchess de Nemours’ and a lacy umbellifer called Orlaya which were also used in the hair and table centre flowers which the family arranged into our Weck jar selection.

STEVEN CARTER HEWSON

Meg chose corals and yellows for her wedding which was perfectly timed for Peony ‘Coral Dawn’ and Icelandic poppies combined with golden Philadelphus and honeysuckle.

photo

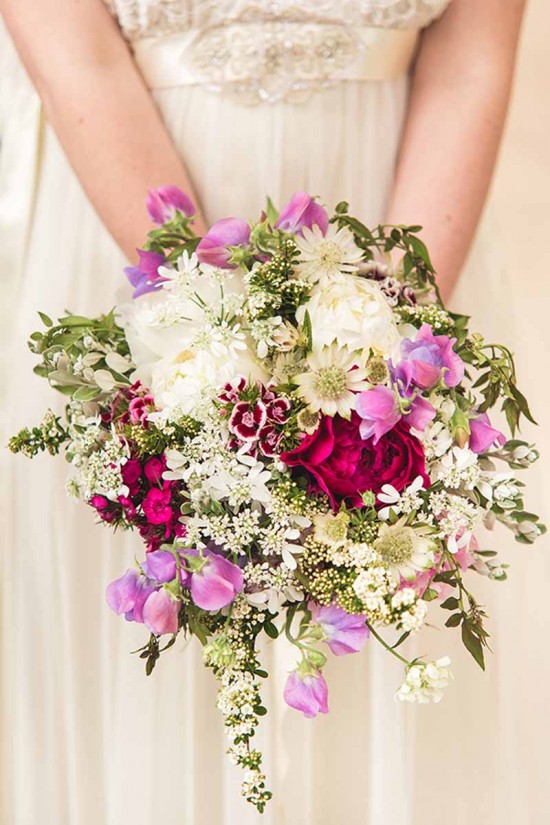
Kate Townshend’s bouquet had a base of Spiraea and Jasmine with sumptuous Peony ‘Kansas’ and Sweet Williams for the deep pink element and scent from a Japanese Sweet Pea variety called ‘Oyama bicolour’. To complement the lace on her dress I also included Astrantia and Orlaya.

PHOTO BY GEORGI MABEE

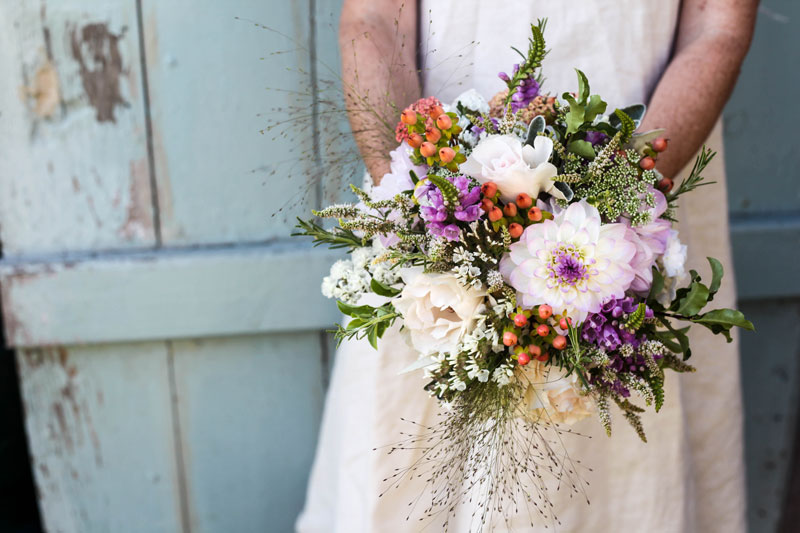
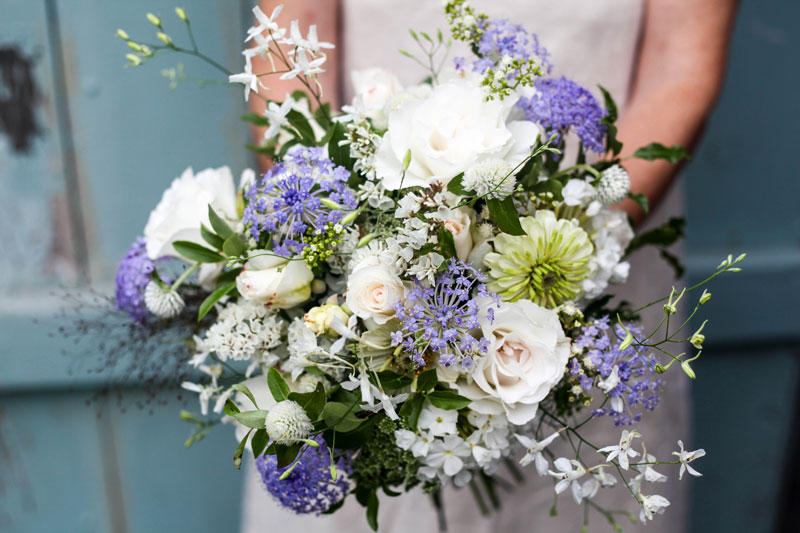
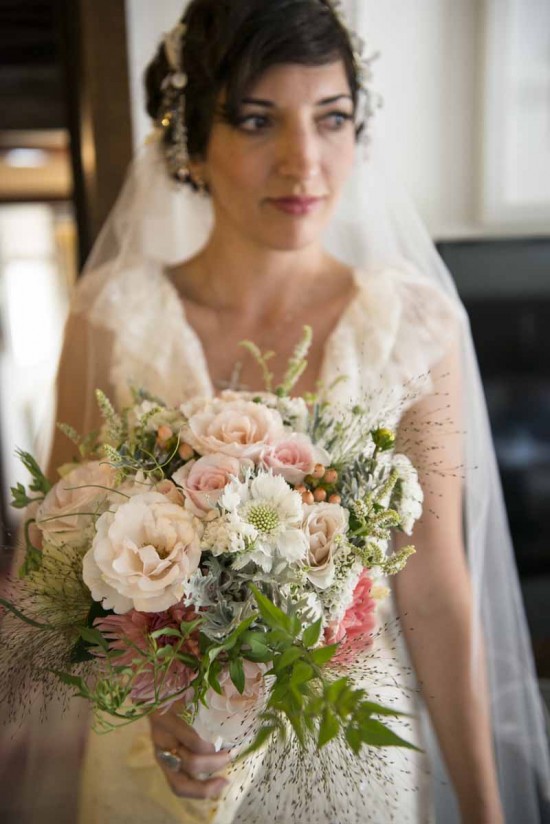
I like to include as much variety, scent and texture as possible in my bouquets – it is hard not to with so much in the garden to choose from. Consuelo’s brief was soft corals, pinks and creams with silvers and greens. I included a few different varieties of roses and dahlias with some peach Hypericum, dusty miller and pineapple mint. Panicum ‘Frosted Explosion’ and Jasmine combined to give the bouquet a wild finish.

_DSC1368

IMG_0379

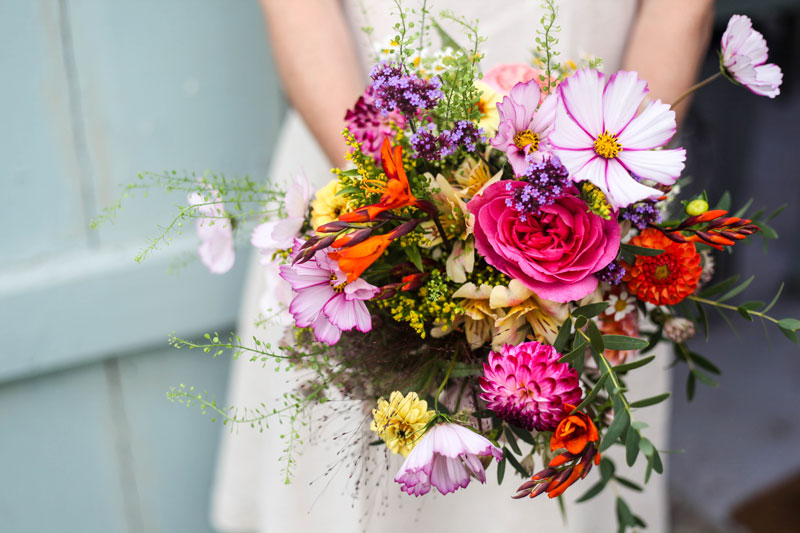
Cecilia’s bouquet in September was a ‘pick of the garden’ creation. She did not have a colour theme and just wanted a very natural, spontaneous combination. The week before we wandered around the garden and she pointed out some favourites and left the rest to me. This is my favourite way to work and what we are really all about.  I call it ‘going with the garden’ and it often produces the most stunning results.

Photo by Craig and Kate www.craigandkate.comPHOTO BY CRAIG AND KATE

Thanks for those brides who got back to us and shared images of their special day, watch this space for more Real Brides…

Sweet Pea Grow Along – Part 4

IMG_9331

Now I know this is a bit overdue and you have probably all planted your Sweet Peas by now but I thought I had better finish what I started!

Our Sweet Peas were planted out last month 20-25cm apart staggered either side of the bean netting. They had been well hardened off for two weeks prior to planting and given a good seaweed feed a couple of days beforehand.

IMG_9656

Once the plants were in, we laid out some irrigation. Sweet Peas like a cool moist root run so we use 2 lines of drip tape and ensure they do not dry out during flowering as this really hits production. We finished off with a mulch of straw in the path, this helps to keep the all important moisture in but is also useful if a frost is forecast in the next few days. Despite being hardy and making it through the winter unheated, young transplants can be killed off or checked by a sharp frost. We simply push the straw up against the plants and pull it back again in the morning, it is much easier to deal with than horticultural fleece once netting is involved.

Slugs can also be a major problem at this stage, we use Ferramol (wildlife friendly) for the first couple of weeks if conditions are wet until they have toughened up and become less appetising.

Now your plants may look rather sad at first, a bit yellow, slightly frosted and slug chewed…well mine did anyway. I don’t worry about it any more as I know they are quietly putting down lots of roots and will burst forth with green abundance when they are ready. This usually takes a good 3-4 weeks.

Once they start to grow away they must be tied in to encourage them up the bean netting or the support of your choice rather than off horizontally across the garden. I am a big fan of the tape tool (Max Tapener) – no fiddling around with string or rings.

IMG_9163

I do not trim tendrils and find if you are growing bush style you will end up with a few kinky stems but as long as you keep up with picking and deadheading it will not be too much of a problem.

IMG_9165

Once the plants start to flower begin feeding with a high potash feed once a week, we use our own homemade comfrey brew and a dilutor.

The most important thing about Sweet Peas is that they must be picked regularly to keep them flowering. I try to go through mine every three days, ruthlessly deadheading. Feeding and regular picking will help to keep the stems long for as long as possible.

IMG_9652

We ran our Sweet Pea masterclass last week which was brilliantly timed for our indoor harvest. I sent everyone off into the polytunnel to pick a bucket of sweet peas.

IMG_9481_edited-1

Watching everyone enjoying the experience has given me an idea…watch this blog for an invitation to Flower Club – a monthly pick you own and arranging session here at the garden…


IMG_9534


Sweet Pea Grow Along – Part 3

Your carefully sown seeds should be showing some signs of life by now. Remember to keep them cool and bright as they start to grow.

The next job is preparing the ground outside, probably not terribly appealing right now unless you are outside the UK!  If your ground is too wet to dig, a mulch of compost would be better than nothing at the moment. Sweet peas like a rich, moisture-retentive soil.

They prefer an open, sunny position,  so avoid anywhere that is in shade for more than a couple of hours a day.

I plant in long 25m rows so I can have an overwhelming quantity to harvest. If you are planning on something smaller, a teepee/wigmam is attractive (made from hazel or older bamboo canes). Sweet peas must be picked or dead headed to keep flowering. I find it hard to reach the flowers in the centre of a teepee, which can make this task a bit of a chore.

I also do not enjoy tying in, as it is far too labour intensive. I find bean netting offers enough support for sweet peas to do most of this bit themselves. It is cheap, quick to erect and creates a veritable wall of scent once the netting is clothed with Sweet Peas. Here is a picture of our indoor sweet peas at this time last year. Note the sunshine….


IMG_8621


Here’s how we prepare our rows. Ground is dug over (ideally in the autumn) with plenty of well rotted FYM. Stout 2.4m posts are banged in at intervals, approx. 3-4m apart. A hole is drilled through the top of each post, wire (electric fence wire) is threaded through and at the same time woven through the top of the netting and tied as taut as you can . Think of it like hanging a simple curtain,  with the bean netting secured to the post using a staple gun to stop any wafting about. Depending on the length of your rows, your end rows may need bracing with a post section notched in and dug into the ground.


  IMG_8618


Green & Gorgeous - 023


This picture was taken by Shannon Robinson last year, when we let the public pick their own. Our next installment will cover hardening off and planting.

Rachel Siegfried

1